Connecting your Samsung soundbar to your TV via HDMI can drastically enhance your audio experience, offering crisp, clear sound to complement high-definition visuals.
HDMI ARC not only simplifies the cabling by allowing audio to travel both ways but also typically provides better sound quality than optical or AUX connections.
So, the question is – “How to connect Samsung soundbar to TV with HDMI?”
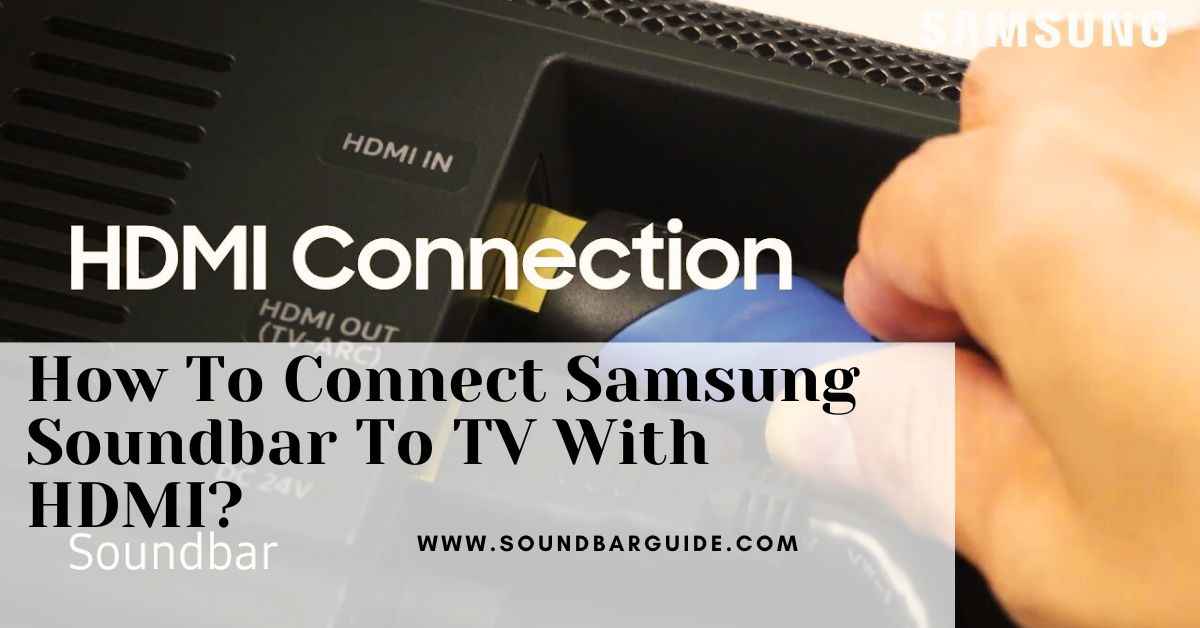
To connect a Samsung soundbar to a TV with HDMI, simply plug an HDMI cable into the ‘HDMI OUT’ port on the soundbar and into the ‘HDMI IN (ARC)’ port on the TV. Ensure you’re using the ARC-compatible HDMI input on your TV for audio return channel support.
In the following, you will find a step by step discussion on connecting Samsung soundbar to TV with HDMI.
So, here we go…
Table of Contents
HDMI Connectivity Basics
Imagine pristine audio quality and seamless control with just one cable. This reality is possible with HDMI connectivity, the universal standard in transmitting high-definition video and audio from one device to another.
Specifically, linking your Samsung Soundbar to your TV using an HDMI connection ensures a straightforward, high-quality audio experience with no fuss.
Benefits Of Using HDMI
- Uncompressed Audio: Experience pure sound without loss in quality.
- Video Plus Audio: Send video and audio through the same cable for less clutter.
- CEC Feature: Control multiple devices with one remote.
- High Definition: Enjoy crystal clear audio that matches your HD video.
- Easy to Use: Simplify your setup with a plug-and-play solution.
Basics Of HDMI For Audio Devices
The HDMI or High-Definition Multimedia Interface is a powerhouse in audio set-ups. It provides a single connection that carries high-quality digital audio to your soundbar.
| Feature | Description |
|---|---|
| Audio Return Channel (ARC) | Carries audio both to and from devices, requiring fewer cables. |
| HD Audio | Transmits high-resolution audio formats from films and music. |
| Plug-and-Play | No need for complex configurations or settings. |
Note: Connecting your Samsung Soundbar to your TV with HDMI means simple, effective control and outstanding audio in one high-tech cable.
Identifying HDMI ARC On Your TV
Connecting a Samsung Soundbar to a TV makes your home entertainment thrilling. But first, identify a special HDMI port on your TV, namely HDMI ARC.
Locating The HDMI ARC Port
Finding the HDMI ARC port is easy:
- Inspect the back or sides of your TV.
- Look for labels like HDMI1 (ARC) near the ports.
- Most TVs have one ARC port among other HDMI ports.
- The port may be distinguished by color or a different shape.
Use a torchlight if the ports are hard to see. The ARC label is your compass.
Understanding ARC Compatibility
ARC stands for Audio Return Channel. It lets the TV send audio to the soundbar with one cable. Here is how to check compatibility:
- Ensure your TV supports HDMI ARC. Older models may not have it.
- Check your soundbar. It should also support ARC.
- Use a quality HDMI cable. Older cables might not support ARC functions.
Read your TV’s manual for details on the HDMI ARC feature. Or check online with your TV model.
Selecting The Right HDMI Cable
Connecting your Samsung soundbar to your TV with HDMI ensures high-quality audio. But first, you need the right cable. Different HDMI cables have unique features. Choose the right one for a clear, crisp sound experience.
Types Of HDMI Cables
Not all HDMI cables are equal. They come in various types. Each type has different capabilities.
Here’s a brief look:
- Standard HDMI: Suitable for HD broadcasts and lower resolutions.
- High Speed HDMI: Perfect for 1080p, 4K video at 30Hz, and 3D content.
- Premium High Speed HDMI: Ideal for 4K UHD video at 60Hz and HDR.
- Ultra High Speed HDMI: Best for 8K, 10K, and advanced features like higher frame rates.
Recommended Cable Length
The length of your HDMI cable can affect its performance. Keep these tips in mind:
| Cable Length | Usage |
|---|---|
| Under 6 feet (1.8 meters) | Perfect for close-range connections. |
| Through 10 to 15 feet (3 to 4.6 meters) | Good for larger setups without signal loss. |
| Over 15 feet (4.6 meters) | May need a signal booster for optimal performance. |
Shorter cables often work best. Long cables may need boosters.
Preparing Samsung Soundbar
Preparing the Samsung soundbar is the vital first step to ensure seamless integration with your TV. This stage sets the foundation for an enhanced audio experience.
Let’s get started with unboxing and setting up…
Unboxing And Initial Setup
- Open the box carefully and remove the soundbar.
- Place the soundbar in front of the TV or on a dedicated shelf.
- Check for included cables, especially the HDMI cable.
- Identify the ‘HDMI IN’ port on your soundbar.
- Connect the HDMI cable from this port to the ‘HDMI ARC’ port on your TV.
- Power up both devices and switch the soundbar input to ‘D.IN’.
Firmware Updates
With your Samsung Soundbar now in place, it’s time to ensure you have the latest firmware.
Firmware updates enhance performance and fix bugs.
Follow these steps:
- Connect the soundbar to the internet via a Wi-Fi or Ethernet cable.
- Access the settings menu using the remote control.
- Select ‘Support’, then ‘Software Update’.
- Choose ‘Update Now’ and wait for the process to complete.
Be patient as the device updates. Your Samsung Soundbar will be ready in no time.
How To Connect Samsung Soundbar To TV With HDMI?
Setting up your Samsung Soundbar with your TV via HDMI can enhance your viewing experience with superior sound quality. This process uses an HDMI cable to transmit audio signals, and it’s important that your TV supports HDMI ARC (Audio Return Channel) to work seamlessly.
Let’s walk through the setup process…
Connecting Samsung Soundbar To TV With HDMI
Get ready for an easy audio upgrade by following these steps:
- Check for HDMI ARC: Ensure your TV has an HDMI ARC port. It’s usually labeled ‘ARC’ on the back of the TV.
- Power Off Devices: Turn off your TV and soundbar for a smooth connection.
- Connect HDMI Cable: Take one end of the HDMI cable and plug it into the HDMI OUT (TV-ARC) port on your soundbar.
- Connect to TV: Insert the other end of the HDMI cable into the HDMI ARC port on your TV.
- Power On Devices: Switch on your TV and soundbar. They’ll communicate through the HDMI cable.
- Set Sound Output: Use your TV remote to navigate to the sound settings. Select the soundbar as the preferred audio output.
Your soundbar should now be connected to your TV. Enjoy the upgraded audio experience!
Troubleshooting Common Issues
Encountering hiccups? Here are fixes for typical soundbar setup problems:
- No Sound: Double-check the HDMI connections. Ensure the cable is firmly seated at both ends.
- Wrong Audio Source: Verify the correct HDMI input is selected on your TV’s audio settings.
- Firmware Update: Update your TV and soundbar’s firmware to the latest version for compatibility.
- Cable Issues: Try a different HDMI cable. Some cables may not support the ARC function.
- TV Settings: Look through your TV’s manual. Some models require you to enable HDMI-CEC settings.
If issues persist, contact Samsung support for further assistance.
Configuring TV Audio Settings
Connecting your Samsung Soundbar to your TV with HDMI ARC is straightforward. But, for the best audio experience, you need to tweak your TV’s settings.
This section guides you through configuring those audio settings after establishing the physical HDMI connection.
Accessing Sound Settings
Before adjusting the audio output, you need to access your TV’s sound settings. Use your TV remote and follow these simple steps:
- Press the ‘Home’ or ‘Menu’ button.
- Scroll to and select ‘Settings’.
- Find the option labeled ‘Sound’, ‘Audio’, or ‘Sound Settings’.
Selecting The Correct Audio Output
Once in the sound settings menu:
- Look for an option called ‘Sound Output’ or ‘Speaker Settings’.
- Choose ‘HDMI ARC’ or ‘Audio Out/Optical’.
The selection synchronizes the TV audio with your Samsung Soundbar.
Note: If ‘HDMI ARC’ does not appear, ensure the HDMI cable connects to the ARC port on your TV.
| TV Settings | Action |
|---|---|
| Sound Output | Select ‘HDMI ARC’ |
| Speaker Settings | Match with Soundbar |
Now, enjoy enhanced audio quality with your optimally configured Samsung Soundbar and TV!
FAQs For Connecting Samsung Soundbar To TV With HDMI
Why is My Samsung Soundbar Not Working on HDMI?
Your Samsung soundbar might not be working on HDMI due to incorrect HDMI cable connection or the TV and soundbar not being set to the correct input and output settings. Ensure the HDMI cable is connected to the HDMI ARC port on both devices, and that both the TV and soundbar are set to use HDMI ARC in their audio settings.
How Do I Connect My Soundbar To My TV With HDMI Cable?
To connect your soundbar to your TV with an HDMI cable, use the HDMI ARC (Audio Return Channel) port on both devices. Plug one end of the HDMI cable into the TV’s HDMI ARC port and the other end into the soundbar’s HDMI ARC port, then select the HDMI input on your TV to route the audio through the soundbar.
Why Is Samsung Soundbar Not Connecting To TV?
A Samsung soundbar may not connect to a TV due to incorrect input selection, outdated software, or faulty cables. Ensure both devices are compatible, and check for any needed updates or proper cable connections.
How Do I Connect My Soundbar To Roku TV With HDMI?
To connect your soundbar to your Roku TV with HDMI, you can use an HDMI cable to connect the HDMI ARC (Audio Return Channel) port on your soundbar to the HDMI ARC port on your Roku TV. Then, go to the TV’s settings, select “Audio,” and enable the HDMI ARC or CEC control.
Conclusion
In summary, connecting your Samsung soundbar to your TV using an HDMI cable is an easy and effective way to elevate your home audio setup. By carefully following the provided instructions, you can achieve optimal sound quality and a hassle-free installation.
Make sure to connect the HDMI cable to the ARC ports on both devices, adjust the audio settings as needed, and verify the connection to ensure everything is functioning correctly. This method not only simplifies your system but also enhances your overall viewing and listening experience.
If you encounter any issue, don’t hesitate to comment below.
Enjoy the enhanced audio performance that brings your entertainment to the next level!


![How To Connect Vizio Soundbar To Vizio TV: [Step By Step Guide]](https://soundbarguide.com/wp-content/uploads/2024/10/how-to-connect-vizio-soundbar-to-vizio-tv.jpg)


Leave a Reply